06 Sep, 2025
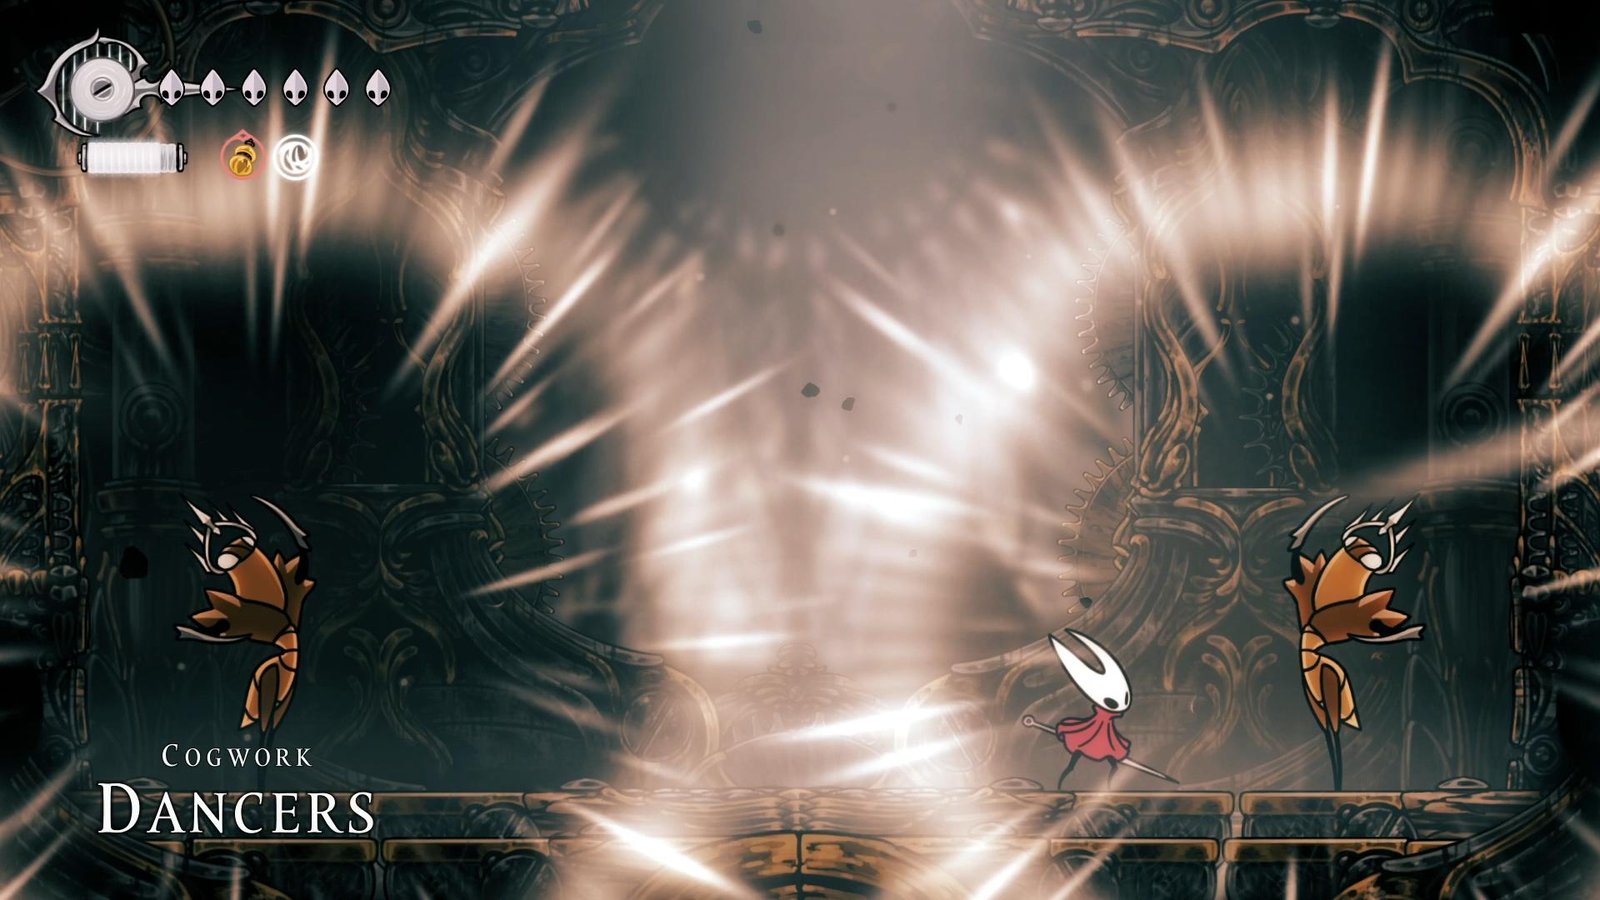
After battling through a gauntlet of bosses to reach the Citadel in Hollow Knight: Silksong, Hornet faces yet another trial. The Cogwork Dancers are the next major boss you’ll face, and they turn the fight into a deadly performance. One missed beat sends you back to the last Bench, having to start the fight from scratch.
In this guide, we’ll break down the Cogowork Dancers’ location, moveset, strategies, and the rewards you’ll get for defeating them.
For more information about Hollow Knight: Silksong, check out the official website here.
Cogwork Dancers’ Location

To reach the Cogwork Dancers’ arena, you’ll first need to make your way through both the Underworks and the eastern side of the Choral Chambers. Continue progressing through the Citadel until you unlock the Bench at Songclave.
From here, the path is straightforward. Head left and, just before you enter the next area, you’ll notice two walls leading up to a passage above.

Jump into the passage and continue left to eventually reach the boss room. Along the way, you’ll encounter three Grand Reed enemies. You don’t need to defeat them. Pogo off their heads and keep sprinting. They won’t be able to catch up to you.

The exact location of the boss room is marked on the image above.
Cogwork Dancers’ Moveset

With the Cogwork Dancers, you don’t need to worry about memorizing a long list of complex attacks. Each move is clearly telegraphed, and you can predict where they’ll land by watching the light strands that emerge from the Dancers’ faces.
They cycle between three attacks throughout the fight:
Slash Attack


This is their main attack and the one that they’ll use most often. From their current position, each Dancer charges in a specific direction while slashing with their weapon. The strand emerging from their face indicates the direction and position of their attack.
Sword Whirlwind

The two Dancers point toward the center of the arena. You’ll see a white AOE marker at the center where their strands meet. After a short delay, the Dancers dash to the marked area and get locked in a close dancing pose.

When this happens, the AOE marked earlier is filled with white slashes that damage you if you get caught in it.

The dancers stay locked in the close pose for a while even after the attack ends. This is a good opportunity for some needle hits.
Special Slash Attack


The Dancers disappear from the arena and you’ll see some strands of light. After a brief delay, they start dashing and slashing across the screen along the path of these strands. As long as you’re not touching these strands, you’re safe from this attack.
Cogwork Dancers’ Strategies
The Cogwork Dancer boss fight is a true test of reflexes and positioning. While their attacks are clearly telegraphed, the speed of the fight, especially in the later phases, makes reacting to both Dancers at once a real challenge.

There are four separate phases in this fight. Each phase ends with a Dancer getting staggered and both of them jumping into the machine in the background. Before the next phase begins, you’ll have enough time to heal and charge up a Needlestrike.
Phase 1
When the fight begins, position yourself near where a Dancer spawns to land a few free hits before they start dashing.

The fight always opens with the basic Slash Attack, and the Dancers will always aim upward for their first strike.
You can be aggressive during this phase since the Dancers take a long time between each attack. However, make sure you’re also managing your health well during this phase. You want to go into phase 2 with full health.
Phase 2

If you’ve unlocked the Needlestrike, start charging it as soon as the Dancers jump to the background. Position yourself near one of the Dancers and unleash the attack as they land, but be ready to dodge. During Phase 2, they can slash directly at you.
Phase 2 plays much like Phase 1, but the Dancers move faster. The safest time to heal is right after they use the Whirlwind attack.

When the AoE marker appears in the center, run to the edge of the arena and start healing. You can also unleash Thread Storm after this attack to deal massive damage to both Dancers.
When you stagger one of the Dancers, Phase 2 ends.
Phase 3
Phase 3 is the most dangerous part of the fight. Unlike before, the Dancers no longer move in sync. One of them will attack after a short delay, which makes it harder to read their movements.

This phase is all about positioning. You’ll want to avoid getting trapped on the edge of the arena. Try to stay near the center so that you can react to both Dancers at the same time.
Don’t get greedy when you see an opening. If you manage to get one or two pokes, back away immediately before they go for their slash attack.

Only heal if you absolutely have to. The Whirlwind attack is still your best opportunity to heal up if you’re low.
Phase 3 ends with one of the Cogwork Dancers breaking down.
Phase 4
Phase 4 isn’t really much of a fight. But you need to finish it to complete the battle. If you die here, you’ll have to restart the fight from phase 1.

You’ll now face just one Dancer. It uses all the earlier attacks, but at a much slower speed. Without its partner backing up, it’s not really much of a threat anymore.
Stay aggressive, keep landing hits, and you’ll end the fight soon enough.
The following video shows you our attempt at defeating the boss:
Rewards for Beating Great Conchflies
Defeating the Cogwork Dancers lets you explore the west side of Choral Chambers. You also get three new objectives that you must complete before you can ascend further.

It’s a mandatory boss required for progressing through the story of Hollow Knight: Silksong.
This concludes our Great Conchflies boss guide for Hollow Knight: Silksong. For a complete walkthrough or related guides, be sure to check out our main hub for the game.
Check out more interesting articles below!